How Is an EPDM Roof Installed in Mason City, IA?
A proper EPDM install follows a clear sequence from deck prep to final flashing. Each step builds on the last — skip one and the membrane adhesion fails or the warranty is voided.
- Tear off the existing flat roof and inspect the deck for damage, rot, or deflection
- Install insulation board — polyiso or EPS — across the full deck surface
- Install cover board over insulation to provide a smooth, stable surface for the membrane
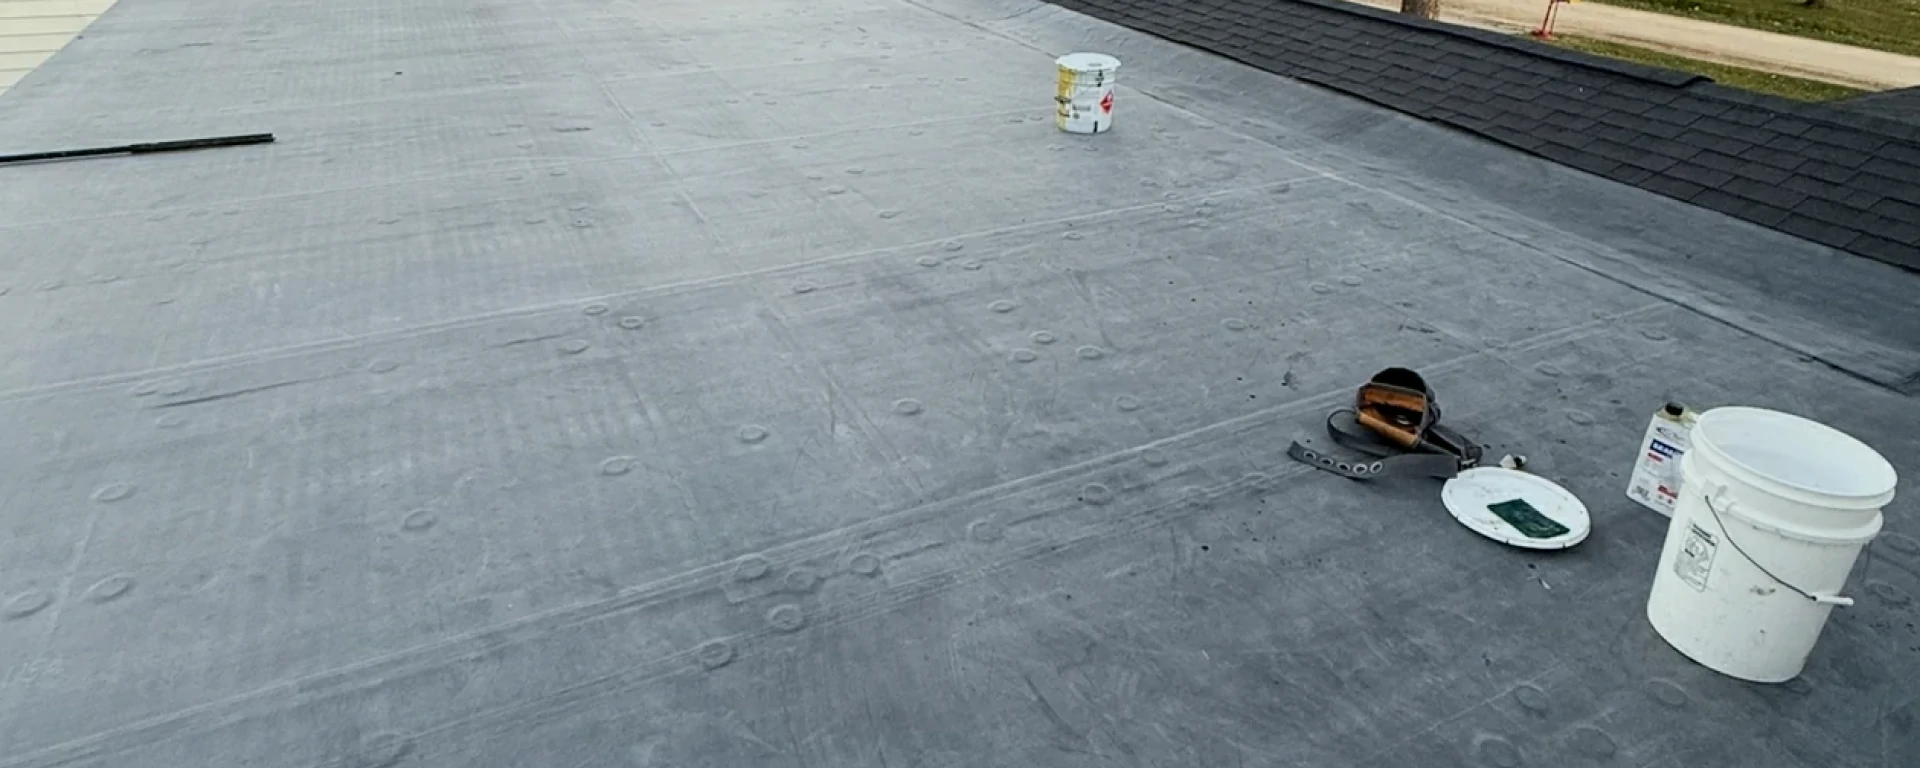
- Roll out the EPDM membrane with the textured side facing up and let it relax flat
- Apply bonding adhesive to both the substrate and the underside of the membrane
- Press the membrane firmly into place and roll all seams with a hand roller for full contact
- Install flashing, edge metal, drain collars, and pipe boots to complete the system
What EPDM Roofing Installation in Mason City Actually Involves
A proper EPDM install is more than rolling out rubber and gluing the edges. The full job covers deck prep, insulation board, cover board, membrane attachment, seam adhesion, flashing, and drain detailing. Each step matters. Skip the cover board and the insulation surface creates bumps that telegraph through the membrane over time. Skip the seam primer and the lap bond fails in the first hard freeze.
A lot of older Mason City commercial and residential buildings have deteriorated built-up roofs under existing EPDM layers. Finding out what is underneath before install day prevents costly surprises when the tear-off starts. Experienced Mason City roofers serving north Iowa check during the first visit and tell you what the deck looks like before the scope is written. What a proper EPDM install covers:
- Full deck check and tear-off of old system if needed
- Rigid insulation board — polyiso or EPS — to Iowa energy code
- Tapered insulation to correct any drainage problems
- Cover board for a smooth, damage-resistant install surface
- EPDM membrane — fully adhered or mechanically attached
- Primed and bonded lap seams at every overlap
- Flashing at walls, parapets, and all penetrations
- Drain collars and pipe boots sealed to manufacturer spec
How to Know If EPDM Is the Right System for Your Mason City Building
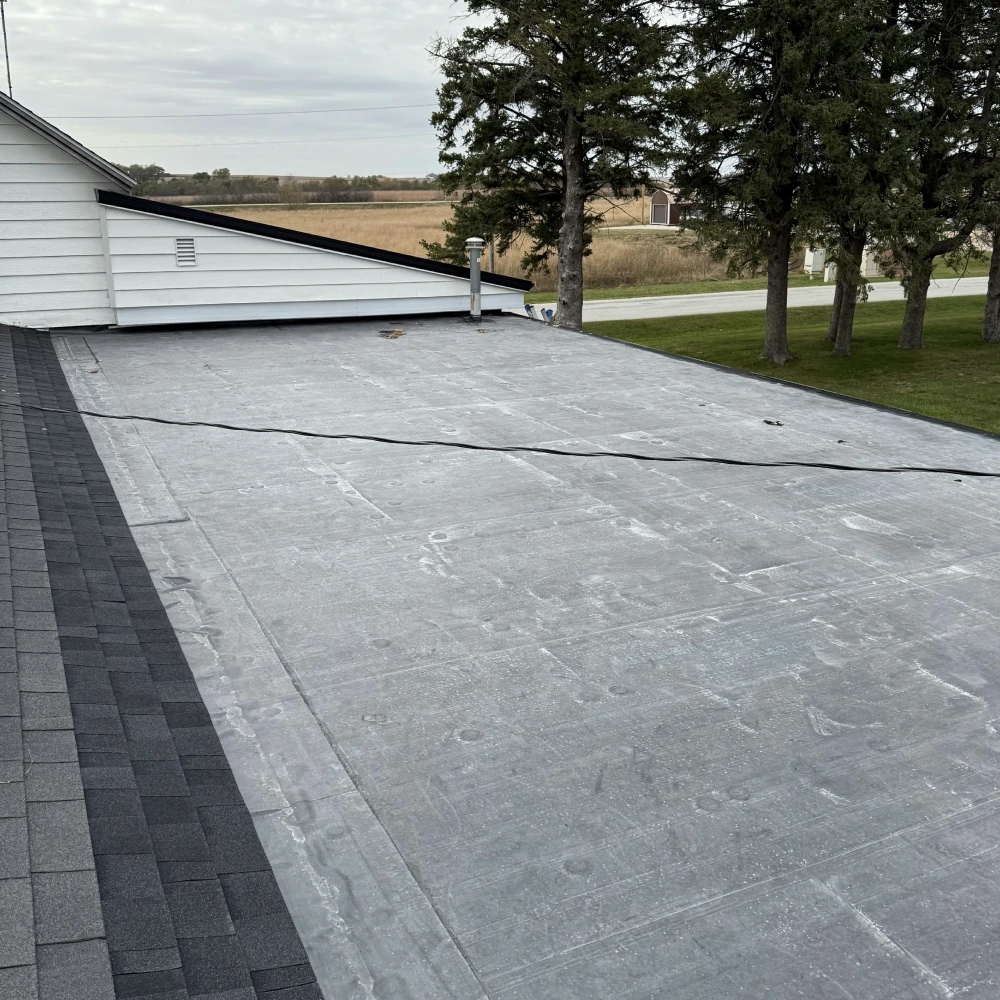
EPDM is a strong fit for Mason City's cold climate. Its rubber membrane stays flexible in subzero temperatures — a real advantage in a region that regularly hits -20°F wind chills. Where TPO seams require heat-welding equipment to bond, EPDM seams use bonding adhesive that skilled installers can apply across a wider temperature range during Iowa shoulder seasons.
EPDM also costs less upfront than TPO on most projects and has a long track record in cold climates across the Midwest. It is not always the right call — roofs with heavy foot traffic, chemical exposure, or high UV reflection requirements may be better served by TPO or modified bitumen. Where EPDM makes the most sense:
- Commercial buildings and low-slope residential additions in cold-climate regions like North Iowa
- Projects where budget is a factor and long-term performance matters more than reflectivity
- Roofs in areas with wide temperature swings where membrane flexibility is critical
- Smaller or more complex roof shapes where fully adhered systems outperform mechanically attached
- Buildings where repair materials need to be widely available over a long service life
What Goes Under an EPDM Roof and Why Substrate Prep Matters in Iowa
The layers under an EPDM membrane matter as much as the membrane itself. The deck condition, insulation board type, and cover board smoothness all determine whether the system bonds correctly, qualifies for full warranty coverage, and survives Iowa freeze-thaw cycles without delaminating. A bad substrate creates bad adhesion. Bad adhesion creates a leaking roof.
Tapered insulation is strongly recommended on most Mason City EPDM installs. Flat roofs in Cerro Gordo County with little to no built-in slope develop ponding water over time. Standing water sits on EPDM seams and accelerates adhesive failure — the number one long-term failure mode on improperly drained flat roofs. Fixing the drainage during installation is far cheaper than fixing it after the membrane is already down. Why each layer matters:
- Rigid insulation board — brings the assembly to Iowa energy code, provides install surface
- Tapered insulation — corrects drainage slope and prevents ponding water at seams
- Cover board — smooths surface irregularities and protects insulation from puncture
- Bonding adhesive — the right product for cold-climate applications, not a warm-weather formula
What the EPDM Installation Process Looks Like Day by Day
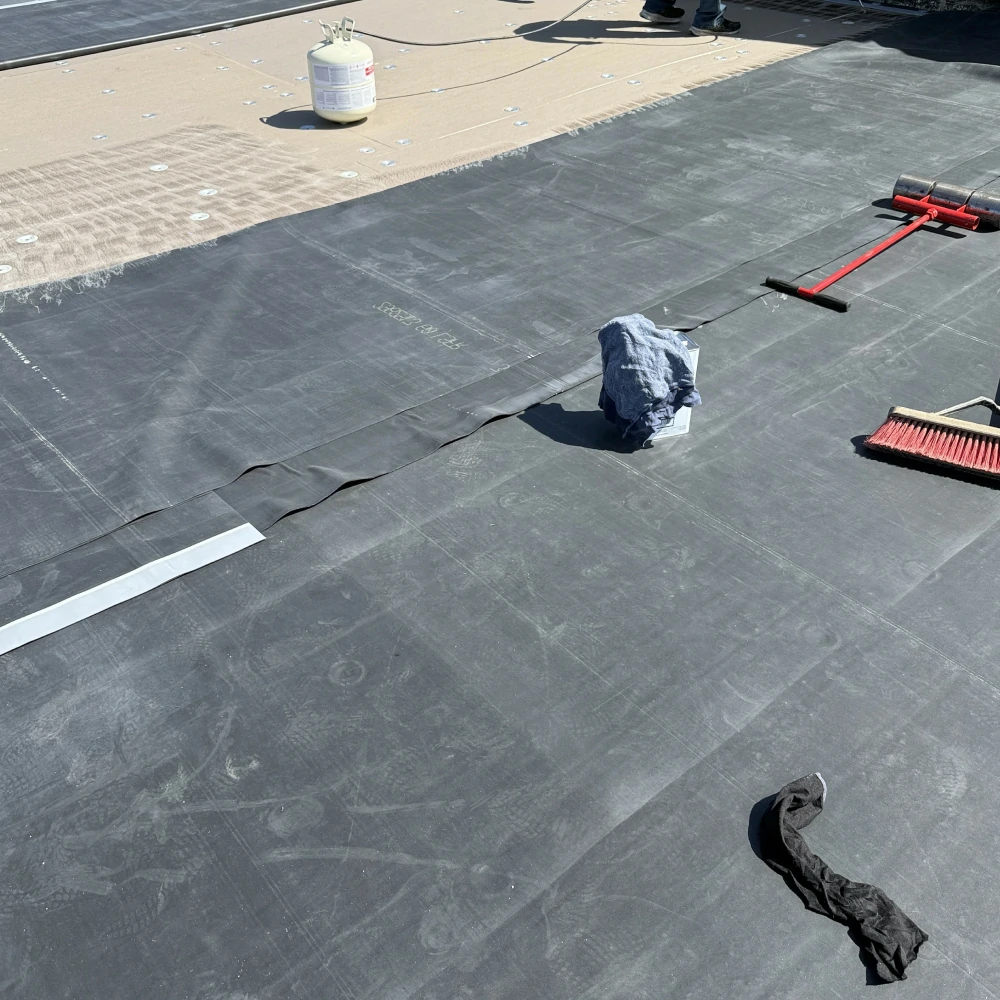
Day one covers tear-off if needed and deck prep. The deck gets checked for soft spots, rot, and deflection before any material goes down. Rigid insulation and tapered insulation go next. Cover board follows. On day two, the EPDM membrane gets rolled out in large sheets and left to relax flat before adhesive is applied.
Bonding adhesive needs dry surfaces and temperatures above 40 degrees to cure correctly. Iowa spring and fall installs require weather window flexibility — an experienced local contractor plans around the forecast instead of pushing adhesive work on a cold or wet day. We give you a real start window and call the same day if conditions push the schedule. Most Mason City EPDM installs wrap up in two to four days depending on roof size.
- Day 1 — Tear-off or deck prep, deck check and repair
- Day 2 — Rigid insulation and tapered insulation install
- Day 2 or 3 — Cover board and membrane roll-out, membrane relaxation time
- Day 3 — Bonding adhesive application and membrane press
- Day 3 or 4 — Seam priming, lap bonding, and hand rolling
- Day 4 — Flashing, drain collars, edge metal, and final cleanup
How to Verify Your EPDM Installer Will Do the Job to Spec
EPDM seam and flashing failures are the leading cause of premature system failure — and both trace almost entirely to installation errors. Ask for the Iowa contractor license number. Ask if the crew holds manufacturer certification for the specific EPDM system going on your roof. Ask how many EPDM installs they have completed in North Iowa in the past year.
Ask whether they stock their own seam tape and bonding adhesive. A crew that installs EPDM regularly keeps adhesive on the truck. A crew that rarely installs rubber roofing orders it when a job comes in — and may use the wrong product for cold-climate applications. The difference shows up in seam life and membrane adhesion. Verify before you sign:
- Iowa contractor license number on the contract and the truck
- Manufacturer certification for the specific EPDM system being installed
- Number of EPDM installs completed in North Iowa in the last 12 months
- Confirmation they stock their own seam tape and cold-climate bonding adhesive
- Three local EPDM references — drive past at least one in Mason City
- Written scope listing membrane brand, thickness, and attachment method
- Named project lead — the person running the install on-site
How Proper EPDM Installation Prevents the Most Common Rubber Roof Failures
Most EPDM failures in Mason City do not come from bad rubber. They come from install errors. Skipped seam primer is the most common. EPDM seams require primer on both surfaces before bonding adhesive is applied — primer cleans the membrane surface and opens the rubber structure for a stronger bond. Skip it and the seam looks solid, holds through summer, and opens during the first freeze-thaw cycle.
Drain collar failure is the second most common problem. EPDM membrane has to wrap into the drain bowl and be clamped with a compression ring to manufacturer spec. Improperly installed drain collars leak from day one — sometimes slowly enough that the owner does not notice until the deck is already damaged. Common EPDM roof install errors that cause early failure:
- Skipped seam primer before bonding adhesive application
- Wrong bonding adhesive formula for cold-climate applications
- No cover board — insulation surface irregularities damage the membrane
- Missing tapered insulation — ponding water accelerates seam adhesive breakdown
- Improperly installed drain collars — leaks from day one
- Flashing laps that are too short or poorly bonded at walls and parapets
- Membrane installed with textured side down — voids warranty and prevents adhesion